Common Mistakes to Avoid When Applying for an eVisa for India
Applying for an eVisa to India should be simple — but one tiny slip can mean a delay, a rejection, or extra stress when you land. This guide explains the Common Mistakes people make, why they happen, and how to avoid them step by step. I’ll also point to where you can do an India Visa Online application and where to check official India Visa Information so you can finish your form with confidence and calm.
Before you start: the two most important facts
- Apply only on the official India Visa Online portal. This is the authorised site to apply for an eVisa.
- Your passport must have at least six months’ validity from your arrival date and usually two blank pages for stamping. Always check your passport before you begin.
If you keep those two facts in mind, you will avoid several Common Mistakes right away.
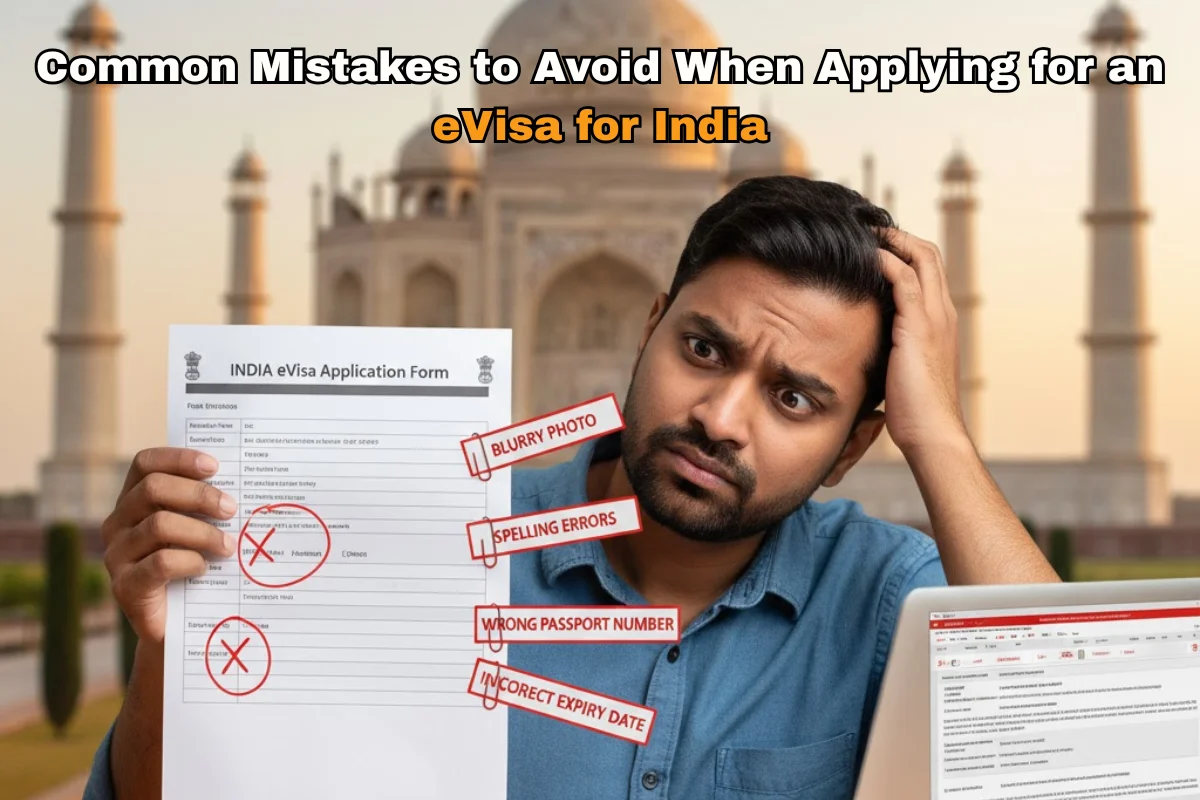
The real Common Mistakes people make — and simple fixes
1) Using the wrong website or a scam site
Many travellers try a third-party site that promises “fast service.” Those sites often charge more and can collect your personal data. Always use the official India Visa Online portal to apply — that avoids extra fees and scams.
(When in doubt, type the government address in your browser instead of clicking ads.)
2) Typing passport details wrong
A single wrong digit in the passport number or a wrong expiry date is one of the most frequent Common Mistakes. The information on the form must match your passport exactly.
Fix: keep the passport open beside you, and copy each character carefully.
3) Not checking passport validity or blank pages
If your passport will expire within six months of arrival, your eVisa can be refused. Also, make sure you have two blank pages for the immigration stamp. This is a very common and easily fixed error.
4) Uploading low-quality or wrong-format photos
Poor photos — blurry, dark, or selfie-style — often cause rejections. The eVisa site has exact photo rules (format, size, pixel limits). Check those before you take or upload a picture. If you upload the wrong file type or a very large file, the portal will not accept it.
5) Ignoring document size and format rules
Scanned documents that are too large or the wrong file type will be rejected or cause delays. Save copies in the sizes and formats the official instructions request (usually JPEG or PDF, with a stated maximum file size).
6) Name mismatches and small spelling mistakes
If the name order, initials, or spelling on the form does not match your passport, immigration officers may question you. Always use the exact name as printed in the passport.
7) Picking the wrong visa category
Tourist, Business, and Medical eVisas allow different activities. Choosing the wrong category is one of the Common Mistakes that can lead to refusal at arrival. Read the list of allowed activities and pick the correct type before you apply.
8) Leaving required fields blank or writing “N/A” when not allowed
Some fields are mandatory: travel history, previous passports, or emergency contact. Putting placeholders like “N/A” can be treated as incomplete information. Fill fields honestly and as completely as possible.
9) Applying too late or counting on last-minute approval
Processing usually takes a few working days, but delays can happen. Applying the day before travel is a common error. Apply early so you have time to fix problems. Official guidance recommends applying well in advance.
10) Payment mistakes or paying on unofficial pages
Always complete payment inside the official workflow. If a payment fails, follow the site’s advice rather than reapplying immediately — duplicate applications can cause confusion and extra fees.
11) Travelling on a different passport than the one used for application
Your eVisa is linked to the passport you used to apply. If you get a new passport after applying, carry both old and new passports or follow the official re-application rules. This is an easy situation to miss and a very common mistake.
12) Not reading the visa conditions (length, entries, entry points)
Some eVisas are single-entry and limited in duration. Using the visa for activities it does not cover — or entering through a non-approved port — can create serious problems. Read the visa conditions shown on your approval letter.
13) Forgetting new arrival steps (e-arrival / online arrival forms)
India now has digital e-arrival steps that some travellers still forget. Check current India Visa Information before you fly so you know if you need to fill an arrival form online. This small check can prevent long lines and delays at immigration.
A short checklist to avoid those Common Mistakes
- Use only the official India Visa Online portal.
- Put your passport next to you and type details exactly.
- Check passport validity (6 months) and blank pages.
- Follow photo specs and file-size rules before uploading.
- Apply at least 3–4 weeks before travel if possible.
- Save a PDF copy of the submitted form and the payment receipt.
Final words
Most Common Mistakes happen because people rush or assume small errors won’t matter. If you take five extra minutes to check your passport, photo, and file types, you will avoid the most common problems. Use the official India Visa Online site for the latest India Visa Information, and if you feel unsure, contact the nearest Indian mission or the official help pages.